Build a POM injection molding window from the exact grade’s processing guidance, then verify it with measured machine conditions and inspected parts. Approve a range only after filling, packing, cooling and restart checks pass the agreed tests.
A saved setup can make a complete part without proving that the process is repeatable. If the material suffix, tool or cycle has changed, yesterday’s settings need review. That is the practical problem this guide addresses.
The method below turns a trial into a record you can check. You will set pass limits, separate setpoints from measured values, and collect proof before signing off a setup. Producer instructions and your approved machine procedures remain the starting point.
Key Takeaways
- Identify the full grade, lot, tool and drawing revision before copying settings.
- Measure melt and mold conditions; controller values alone don’t describe the process.
- Study filling and packing separately, with a record of what stayed fixed.
- Check dimensions and function as well as part mass.
- Release a versioned window with clear interruption and change rules.
Define the Grade and Acceptance Criteria Before Setup
State the material and the part requirement
A recipe with no grade revision is incomplete. POM homopolymer and copolymer labels name a family. You need the full grade name to find the right process sheet.
Include modifiers, color and any agreed use of regrind. A similar name does not prove that grades can share a setup.
Start with the producer’s current data sheet, process guide and safety data sheet. Put the document revision beside the grade on the trial record. A family manual explains the method. Use the exact-grade sheet to choose where to start.
Next, turn the drawing into checks the trial can answer. Identify fit dimensions, appearance zones, assembly requirements and relevant functional tests. Agree how to check parts, when to measure them and what must pass before you change the machine.
Your team needs the same goal. A smooth surface alone may not meet the drawing.
Before discussing a trial lot, assemble the full grade and application details. Use the POM acetal pellets guide for procurement context, then bring the exact producer documents into the trial discussion.
Build a traceable trial cover sheet
Record these fields together so the results remain usable after a shift change:
| Record group | Details to capture | Decision it supports |
|---|---|---|
| Material | Producer, complete grade, color, lot, packaging history | Which instructions apply? |
| Equipment | Machine, screw, tool, cavity identification | Can the setup be reproduced? |
| Part | Drawing revision, inspection method, agreed limits | What counts as acceptable? |
| Trial | Operator, document revisions, approved changes | Who can explain the result? |
Illustrative scenario: A mold returns to the press with a different suffix on the resin label. The operator finds the previous setup, but pauses before loading it. The next action is to compare the grade documents and change approval, rather than assume the old thermal program still applies. This is a hypothetical decision, not a reported customer result.
If a sheet lists only a family name, ask which full grades it covers. Keep that reply with the trial. Do not guess which suffix was meant.
Keep the resin label or its lot record with the parts. If a result later looks unusual, you need to distinguish a material change from a setup change. An unknown blend or unmarked bin leaves that question open, even when the molded part looks good.
Set POM Injection Molding Starting Conditions from the Right Document
Separate melt, barrel and tool temperatures
Two recommended temperatures can both be correct for different grades. The Delrin molding guide, in its processing summary, gives an optimum melt temperature of 215 ± 5 °C for standard grades and 205 ± 5 °C for toughened grades. These values apply to the named groups. They are not a window for all POM.
The Hostaform product manual, section 5.2.2, describes an optimum melt range of 190–210 °C and separate guidance for modified products. Both are older manuals. Check the current exact-grade sheet before you use one of these values.
Barrel zones are controller settings; melt temperature is a material measurement. Mold-circuit settings and mold-surface measurements also describe different things. Have trained staff use the approved method.
Note where and when they took the reading. Without those details, the value is hard to compare across trials.
| Variable | Setting to record | Measurement or observation to add |
|---|---|---|
| Melt condition | Barrel and nozzle programs | Actual melt temperature and method |
| Tool condition | Circuit setpoints and connections | Mold-surface temperature at agreed locations |
| Plasticizing | Screw speed and back pressure | Recovery time and cycle context |
| Filling | Speed profile and pressure limit | Fill time and actual pressure response |
Add a row for each check on the setup sheet. Who took the reading? Where was it taken?
Was the tool still warming up? Keep the time with the value so the next shift can repeat the check. Leave an unknown value blank and mark it for follow-up; do not fill it from the setpoint.
Do not average different producers’ ranges to invent a compromise recipe. If documents conflict, resolve the grade identity and document revision with the producer before the trial.
Record units, pressure basis and thermal history
Write down whether a displayed pressure is hydraulic, plastic or cavity pressure. They are not equal values. You need the right machine ratio or test basis to compare them.
Keep units explicit when transferring records between presses. A pressure limit also differs from the pressure the process actually reaches.
Record shot size, cycle time, recovery time and interruptions alongside thermal settings. The Delrin molding tips connect melt quality with thermal history and residence. A temperature value alone does not establish acceptable exposure.
Check the grade and handling history before you decide to dry the resin. Check sealed packaging, opening history and producer instructions before deciding on drying. The site’s plastic pellet storage guide provides handling context; it cannot replace a grade-specific moisture requirement. Do not import another resin’s drying cycle or use drying to explain every surface defect.
Establish Filling and Transfer Without Hiding Tooling Problems
Observe the flow path and cavity balance
A full-looking part does not prove that filling is controlled. First, keep the grade and measured heat conditions fixed. A trained technician can then follow the approved trial method.
Check how the tool fills and how the cavities compare. Stay within producer and machine limits.
Record the speed profile, fill time, transfer point and defect location. Note whether a mark stays at the same feature, follows one cavity, or appears across the tool. These observations help frame a tooling review before another heat or speed change.
For a multi-cavity mold, preserve cavity identity through inspection. Combining all parts in one bag hides differences that may matter. Mark the parts and keep the trial row with them. Keep failed parts too when the agreed plan calls for it.
Illustrative scenario: A surface line repeats near a section change. The technician holds the resin and thermal baseline fixed, then compares approved fill observations and cavity locations. The next question concerns flow, gate and vent conditions. Raising the barrel temperature without that record would leave the cause uncertain; no successful fix is claimed here.
Check transfer and machine response
Compare the commanded speed with actual fill behavior. Record pressure response, cushion and the point of transfer from filling to holding. If the process reaches its pressure limit, ask whether the intended speed remains achievable.
The saved speed value cannot tell you. Check the trace.
Use a short observation log rather than a sequence of undocumented adjustments:
| Trial field | What to write |
|---|---|
| Frozen variables | Grade, thermal baseline and unchanged tool conditions |
| Intentional change | The single factor or planned combination being examined |
| Machine response | Fill time, pressure behavior, transfer and cushion |
| Part response | Cavity, defect location and inspection result |
Don’t choose a fixed transfer percentage from a general guide. The tool, part and machine need a justified method. Ask the tool team to review a suspected gate, vent or flow-path limit. Don’t keep pushing settings to hide it.
If trial material is still being selected, use the pellets for injection molding guide to organize sourcing questions. Keep that procurement decision separate from proof that a specific tool fills correctly. The trial record must connect both.
Verify Packing, Gate Seal and Cooling with Part Evidence
Run a controlled holding-time study
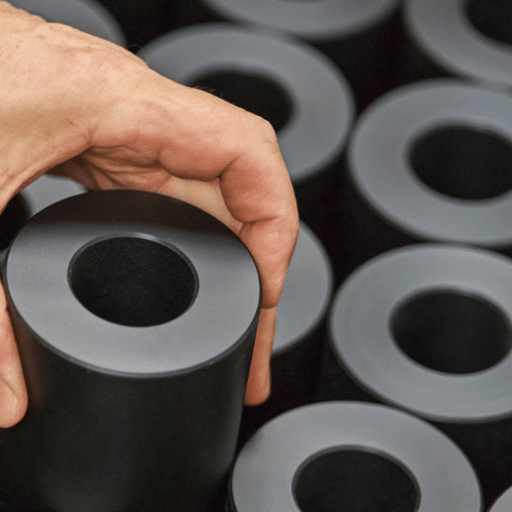
More hold time helps only while resin can still enter the cavity at the tested settings. The Hostaform manual describes checking part weight as holding time increases, while keeping the overall cycle constant. Its method gives a practical basis for studying packing response rather than choosing a timer by habit.
Use an approved holding pressure and planned time increments. Hold other relevant conditions steady, identify samples by cavity, and weigh them using a suitable method. Write down how you kept the full cycle the same. If cooling changes too, the results are harder to compare.
Plot or tabulate part mass against holding time for each cavity. A plateau suggests that longer holding no longer adds measurable mass under those conditions. It does not prove that the part has no voids. Nor does it prove that a dimension passes or the full process range works.
Avoid prescribing holding pressure as a fixed fraction of injection pressure. First establish what each pressure value means and how the part responds. Gate geometry, section thickness and the approved grade guidance belong in that review.
Confirm dimensions and ejection quality
Inspect more than surface sink. Check the agreed dimensions, appearance areas and functional requirements. If internal quality is relevant, use the inspection method agreed for that requirement. Part mass is a useful response, but cannot substitute for a test of a different property.
Keep a clear record of cooling and part checks. Record cooling time, tool condition, ejection observations and elapsed time before measurement. Compare samples at the agreed inspection age.
Don’t compare a part just out of the tool with one measured later in a different state. Agree when to measure each group.
Illustrative scenario: The mass curve appears flat, but a fit dimension still fails. The quality engineer retains the samples and checks cooling, measurement timing and the drawing requirement. The team does not declare release from the mass result alone. Nor does it assume that extra holding time will correct the dimension.
Make an evidence table by cavity
Use a worksheet that keeps the responses together:
| Condition | Holding time | Part mass by cavity | Dimension and measurement age | Appearance/function | Disposition |
|---|---|---|---|---|---|
| Trial identifier | Recorded value | Measured results | Method and result | Agreed checks | Accept, reject or investigate |
The row above is a blank record structure, not test data. Add the gauge and sample IDs so you can find the raw results. Agree sample quantities with the responsible quality team rather than borrowing an arbitrary count.
Connect each sample group to its incoming lot through your plastic pellet quality-control record. Before asking about a replacement POM grade, prepare the current designation and this trial evidence. Use the POM grade and procurement overview to organize that discussion without assuming that a resin change will cure a tooling issue.
Challenge the POM Injection Molding Window Before Release
Choose boundaries and measure interactions
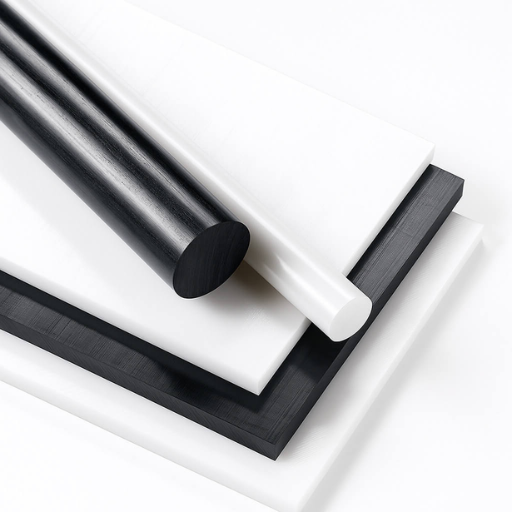
A nominal condition is one point. A window needs proof that parts pass at the tested limits. Choose limits you can justify.
Stay within the producer and machine limits. Do not use a generic temperature table as permission to test beyond them.
Build a bounded trial matrix with the process and quality teams. Name each test point. State why you chose it and which result will decide a pass.
Include combinations where a plausible interaction needs examination. A one-factor trial can explain a trend. It can’t prove that all pairs of high and low settings will pass.
For example, the plan may examine a nominal point and justified filling, packing or cooling boundaries. These are categories for a team to define, not prescribed values. Record the actual conditions reached at each point, not only the intended settings. If the machine cannot hold a selected condition, that is a result to investigate.
| Matrix element | Evidence needed before release |
|---|---|
| Nominal condition | Stable recorded conditions and passing agreed checks |
| Justified boundaries | Actual settings, measurements and part responses |
| Relevant combinations | A documented reason for inclusion and test results |
| Exceptions | Failed conditions, investigation and approved disposition |
Relate the acceptance tests to the application. The engineering plastics selection framework helps organize service conditions and material requirements. This article’s process record complements that selection work; neither replaces application qualification.
Control interruption and restart
Plan how the trial will handle interruptions before they happen. The Delrin technical guidance warns about excessive thermal exposure and incompatibility with halogenated polymers. Follow the current SDS, producer instructions and approved plant procedures for material changes, shutdown and restart. Do not improvise a purge sequence from a discussion thread.
Note how long the stop lasted, the state of the press and what staff did. Keep restart parts apart from steady-run parts. Define the checks and approval needed before production resumes.
A setup that passes in a steady run may still need restart checks. Keep both sets of parts.
Release a versioned setup and change record
The sign-off file should link the resin, tool and test method to each trial point. Include raw results, failed settings and any changes to the plan. Name who signs off each check.
Keep the failed trials. They show why you chose the approved limits.
Return to the changed-suffix scenario: its outcome is a documented qualification decision, not permission to reuse the old program. State which material or equipment changes trigger review. Save the approved setup version. The next shift should be able to find it without asking who remembers the run.
Before a grade discussion, assemble application limits, current producer documents and trial records. That gives you a clear question: which part test or process response needs more work? It avoids asking a supplier to infer a complete molding problem from a resin family name.
Questions to Resolve Before Running a POM Trial
What temperature should I use for POM injection molding?
Use the current processing guidance for the complete grade, then measure the actual melt and tool conditions. Family manuals give examples with different scopes, including modified grades. Do not merge them into one range. Record the measurement method and thermal history before interpreting temperature as the cause of a defect.
The first document to request is the exact-grade processing sheet, not another generic settings table.
Does POM always need drying before molding?
Follow the producer’s grade-specific instructions and check packaging and exposure history. A sealed standard grade and an exposed or modified grade may require different preparation. Do not assume every POM needs the same drying cycle, or that drying will resolve every surface mark. Keep the handling decision in the trial record.
If material identity or storage history is incomplete, resolve it before using the batch to establish a baseline.
How do I know whether holding time is long enough?
Study mass response as holding time increases under controlled conditions, with a constant overall cycle where the approved method requires it. A mass plateau helps identify when additional holding stops adding measurable material. Then verify dimensions, appearance and relevant functional or internal-quality requirements. The plateau alone is not a release decision.
Keep separate cavity results so an average does not conceal an outlying cavity.
Can I copy a process from another POM grade?
Use the previous record as background, then compare the complete grade, producer instructions, tool and machine conditions. Similar family names do not establish interchangeability. A modifier, color or authorized material change needs review against the application and process requirements. Approve the new setup only after its agreed trial checks pass.
Document what changed and which previous evidence still applies. Don’t assume the old sign-off covers the change.
What belongs in the final process-window record?
Include material and lot identity, document revisions, machine and tool details, actual measurements, tested boundaries and raw part results. Add inspection methods, measurement timing, deviations and approval responsibilities. State the interruption, restart and change rules. A reader should be able to trace each pass decision to the parts and settings used.
Before sign-off, check that every approved condition has a result, every sample has an identity, and every exception has a disposition. Failed checks stay open. One good-looking part does not close them.
For the next material discussion, prepare that record alongside the POM acetal pellets overview. Start with the exact grade and the requirement you need to verify. Use the record to agree what to test next, who will check it, and what a pass means.