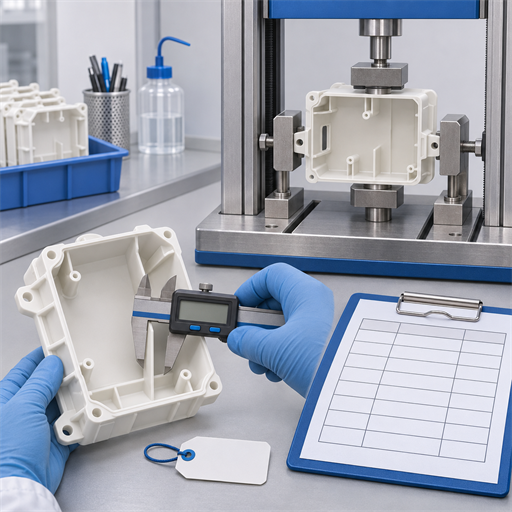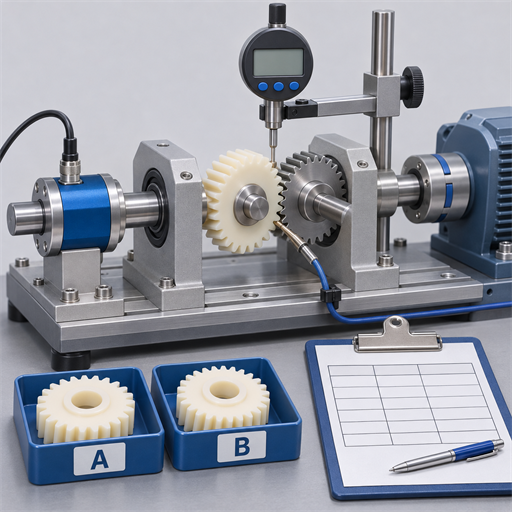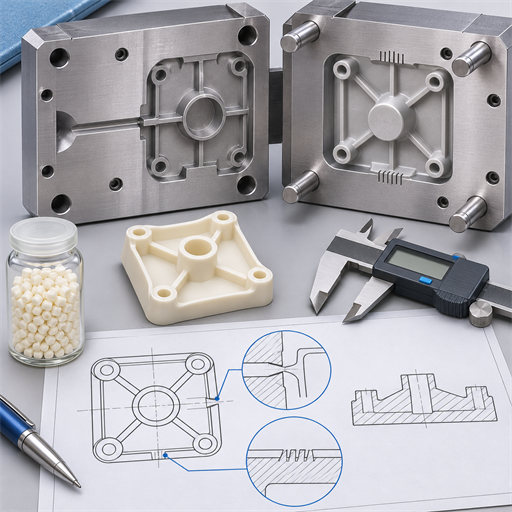
For POM sink marks and suspected internal voids, first map where the defect occurs. Then run a controlled packing test and check the surface, core and part dimensions against agreed limits.
A smoother surface doesn’t close an internal-quality question. If you’ve changed holding time without a clear result, the next useful step is a test that separates feeding behavior from part acceptance. Here’s what to hold steady, what to measure and when to stop changing settings.
Start with the complete resin designation, rather than just “acetal.” Our POM acetal pellet guide covers the wider grade-selection task. Here, the focus is the evidence needed to assess a local molding defect.
Key Takeaways
- Map the defect to a feature and cavity before changing the process.
- Compare holding time with consistently measured part mass, keeping trial conditions controlled.
- Check critical internal regions when required; a weight plateau cannot prove they are sound.
- Approve the part against defined requirements, including dimensions and function, rather than appearance alone.
Before preparing a trial, browse the plastic pellet catalog and record the exact grade you intend to discuss, including its suffix and current producer documents.
Distinguish POM Sink Marks from Internal Voids
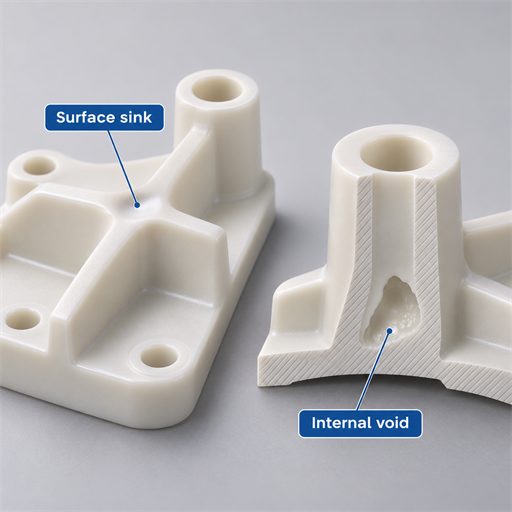
A sink mark is a dent in the surface. A shrinkage void is a hole left inside the molded section. As the material cools and shrinks, more melt must reach the section to replace that lost volume. Local wall thickness and the path for that melt both matter.
Autodesk’s sink-mark and void guidance explains this distinction and its connection to thick regions.
Map the feature before naming the cause
Mark the defect on the drawing and on an identified sample. Note the cavity, gate location and nearby boss, rib or wall intersection. Photograph the surface under consistent viewing conditions so later comparisons answer the same question.
Use this table to plan the first checks. It helps you ask what caused the defect; it does not set the limits for accepting a part.
| Observation | Working question | Evidence to collect |
|---|---|---|
| Local surface depression | Is the section adequately fed as it cools? | Feature location, surface record and packing response |
| Enclosed cavity | Is shrinkage the mechanism, or is another cause involved? | Internal examination tied to the feature and trial |
| Suspected gas pocket | What material, filling or thermal evidence supports gas? | Handling history, process record and qualified examination |
| Smooth surface over a thick region | Has internal quality actually been checked? | Required inspection coverage and acceptance result |
Don’t infer the mechanism from a photograph alone. A cut can show a hole, but the hole alone does not tell you its cause. Nor should the team assume every internal cavity means wet pellets. Record handling and thermal history without turning those possibilities into a diagnosis.
Keep appearance and internal acceptance separate
Illustrative scenario: A boss looks smoother after a cooling adjustment. The team records the surface improvement but leaves internal acceptance open. It identifies the critical region for examination instead of reporting that the defect has disappeared. This is a decision example, not a customer test result.
Cooling changes can alter how a defect presents, so inspect what the drawing requires. A hidden cavity isn’t an acceptable substitute for a visible sink merely because the outside looks better. Don’t call a visible sink harmless until you check where it sits, the part’s size and what the part must do.
Keep both the original and revised samples. Their paired records help the reviewer distinguish an appearance change from evidence that the local feeding problem was resolved.
Define the Grade, Baseline and Acceptance Checks
The same timer does not mean the same test if the grade, tool or pressure basis has changed. Before the trial, write down a starting state that another engineer can repeat. Use the record below as a worksheet. Ask the process and quality owners to set its limits.
Record what remains fixed
Write down the producer, full grade name, lot and color. Note whether regrind is used and on what basis. Keep the current grade data sheet and molding guide with the record. The guide to pellets for injection molding gives the wider selection context; a generic resin family is not a complete trial identity.
Record the tool revision, which cavities are running, the machine and the screw ID. Add filling and transfer conditions, holding profile, cushion, melt and mold conditions, cooling time and overall cycle. Record thermal history and any interruption before sampling.
Separate settings from observations. A controller setpoint is not a measured melt temperature, and a machine pressure display is not automatically cavity pressure. State units and pressure basis so later comparisons do not mix unlike measurements.
Agree how each requirement will be judged
Ask quality how to view the surface and where to check inside the part. Agree how small a change the gauge must detect and when to measure part size. Define how to confirm steady running, choose samples and judge each result. Those choices depend on the part and risk; this guide cannot set one void limit or sample count for all parts.
Write the stop conditions before starting. Flash, unacceptable ejection, dimensional failure or movement beyond approved machine, material or tool limits should trigger the agreed response. Don’t wait until a trial becomes difficult to decide which failures matter.
Name who can approve each decision. The process engineer may record steady running while quality still holds the part for an internal check. Purchasing may confirm the lot papers while molded parts remain on hold.
Keep samples labeled through trimming, weighing, sectioning and measurement. If the record loses the link between a result and its cavity or trial condition, repeat the relevant check. An unlabeled sample cannot answer which setting produced the observed defect.
Run a Holding-Time Study and Interpret the Weight Curve
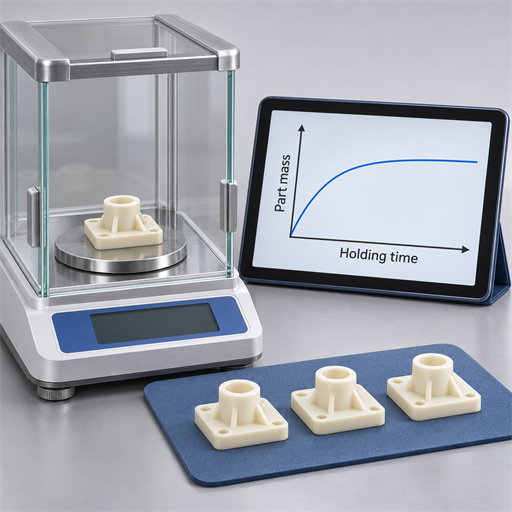
A holding-time study asks whether more holding time still changes part mass at the chosen settings. It does not look inside every region of the part. The Delrin Technical Molding Guide, in its packing-phase discussion, connects this study to adequate gate design.
Change time while controlling the experiment
- Establish repeatable filling at an approved holding pressure. Confirm the baseline and sampling method before collecting comparison parts.
- Choose holding-time steps with the process owner. Keep grade, transfer, pressure and thermal conditions controlled rather than changing a bundle of settings.
- Maintain the intended overall cycle through the timing changes. The Hostaform Product Manual describes a constant-cycle holding-time study; document how holding and remaining cooling time are defined on your machine.
- At each setting, wait for steady running as agreed in the plan. Collect labeled parts from each cavity. Trim them the same way and weigh them by the agreed method and at the agreed time.
- Plot mass and its observed spread against holding time. Retain the individual observations and compare the plot with surface, internal and dimensional results.
Holding time is the planned variable. If a restart or temperature drift changes the baseline, mark the interruption. Do not quietly place those parts in the same comparison set.
Keep cavities and measurement conditions visible
Weigh saleable parts on a consistent basis. Mixing runner mass with trimmed-part mass changes the question the plot answers. Record the balance and resolution, trimming method, time of measurement and cavity identity alongside the observations.
Illustrative scenario: A team receives a flat plot based on pooled shot weights. The defect concerns a boss in one cavity, but the summary has lost that cavity’s identity. The team requests separate cavity records before interpreting the local problem. No numerical result or successful correction is implied.
Keep each weight reading even if you also report a mean. The mean alone does not show whether each cavity behaved alike or whether the spread changed. Label the plot axes with time and mass units, and keep the raw sheet beside it.
Treat a plateau as a finding with conditions
When more hold time no longer adds mass that the balance can detect, the plot has reached a plateau for that trial. First check how small a change the balance can read and how much the readings vary. Then ask whether melt can still pass through the gate and reach the defect.
An early frozen feed path can block more melt while a thick region still needs it. That is why the producer requires a suitable gate for this method. A flat curve does not prove the core is sound.
Where suitable pressure sensors exist, review the relevant traces with the process engineer. Preserve their locations and timing. A machine setting or a single peak value does not replace that record. Carry the selected time condition into the next checks as a candidate, with acceptance still open.
Test Packing Pressure and Check the Inside of the Part
Once you understand the time response, test pressure changes within the approved limits. Check whether the part improves on all required measures without a new fault. More pressure is not always a safe or useful next step.
Compare pressure with more than surface appearance
Keep the selected timing, filling conditions and measurement method controlled while testing the planned pressure conditions. Record the full holding profile and pressure basis. Retain observations of cushion and other process changes that could affect interpretation.
At each condition, check the sink, flash, ejection behavior and required dimensions. Inspect the internal region according to the quality plan. If appearance improves but another required response fails, record both findings rather than choosing the favorable one.
Use the same sample identities across the records. A photograph from one condition and an internal result from another cannot jointly prove a candidate condition acceptable. If destructive inspection prevents later measurements, plan the measurement order and matched samples in advance.
Choose internal inspection for the actual question
Ask the quality owner how to check the inside. It may choose planned cuts through the part or a qualified method that examines a volume. Record where to look, the view or cut direction, the area covered and the smallest flaws the method can detect. State only what that check can show.
A cut shows only the plane you cut; it can’t prove the whole part is clear. A method such as CT also needs a qualified plan before a finding of no flaws can support release. The plan must suit the part and the flaw you need to find. This guide sets no CT resolution and makes no claim that Yifuhui offers the test.
If you can’t yet perform the required check, keep the internal result open. Steady mass and parts that measure within limits do not fill that gap. Agree the next check with the quality reviewer.
Keep a multi-response trial record
Use a blank worksheet like this one, adding the sample and method references needed by your quality system. “Record” means enter actual evidence, not assume a pass.
| Trial and cavity | Hold time and pressure basis | Part mass | Surface | Internal result | Dimensions and decision |
|---|---|---|---|---|---|
| Record sample IDs | Record settings and units | Record values and spread | Record feature and method | Record coverage or pending check | Record results and disposition |
For the broader distinction between incoming material checks and part validation, see plastic pellet quality control. A pellet lot record and a molded-part inspection answer different questions.
Before a technical review, assemble the grade documents, drawing, trial worksheet and identified inspection results. This gives the reviewer a specific unresolved requirement to address rather than a general report that “more packing did not work.”
Recognize When the Feed Path or Geometry Needs Review
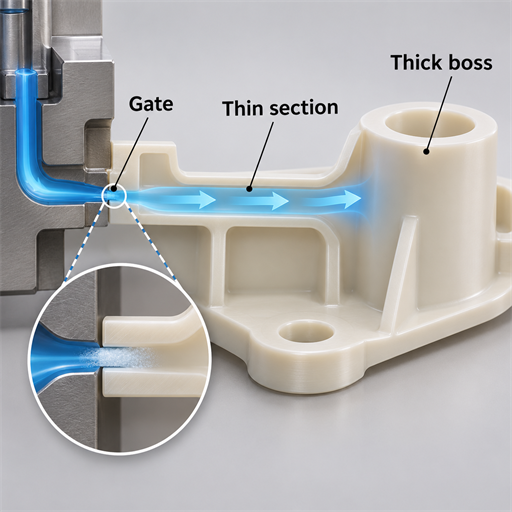
Extra holding time cannot feed through an already frozen path. Stop repeating a setting change when the observations no longer support it as a useful next experiment. Ask for a review of the feed path and local shape using the trial record. Keep any unproven cause labeled as a possible cause.
Look for a local feeding limitation
Review the path from the gate to the affected section. A thick boss reached through a thinner region raises a different feeding question from a defect beside the gate. Ask the tooling engineer to review gate location, restrictions and local wall intersections against the producer’s design guidance.
Ask for that review if more time adds no mass, the same defect persists in a distant thick region, or pressure trials cause new failures. These findings justify a closer look. They do not prove which tool feature is wrong.
Don’t assume a smaller gate will remove a sink. Gate size, location and freezing behavior must be assessed together with the part and material. Equally, do not promise that enlarging a gate will solve the problem. Get engineering approval before changing the tool, then test the changed tool again.
Bring evidence to a grade or tooling discussion
Illustrative scenario: Purchasing proposes changing POM family because a thick feature has an internal cavity. The team first asks whether the current feed path can supply that feature. It keeps any grade substitution as a separate qualification decision. The scenario illustrates the order of questions, not a result from a Yifuhui project.
Use the engineering plastic selection framework when comparing application requirements. A different grade can require a different process assessment; family names alone cannot guarantee freedom from voids.
Send the drawing revision, defect map, cavity identities, current grade documents and controlled trial results for review. Explain which responses changed and which did not. Include any restriction on redesign, so the engineer can distinguish a feasible experiment from a change the project cannot authorize.
Keep detailed gate and vent redesign separate from this packing verification record. The immediate decision is whether the available evidence supports another controlled process trial or requires a tooling or material review.
Approve a Packing Verification Record
For approval, match each requirement to a real result. A steady weight curve is one part of that record. You still need to finish any required internal check. Use a table to make each decision clear.
Match requirements to evidence
| Requirement | Evidence in the record | Decision owner |
|---|---|---|
| Surface quality | Identified feature, viewing method and result | Designated quality reviewer |
| Internal quality | Inspection location, coverage, limits and result | Qualified inspection and quality owners |
| Dimensions and function | Measurement state and required checks | Responsible engineering and quality owners |
| Material and process identity | Grade, lot, cavity, tool revision and trial record | Assigned material and process owners |
Accept only when all required checks meet their approved limits. Hold when a result is missing or fails. Ask for review when the next trial would exceed allowed limits or require a design change. Use these choices to support your own release rules, with the named owner signing each decision.
Separate pellet lot acceptance from molded-part release. Correct material identification is necessary for traceability, but it does not show whether a particular molded boss meets its internal-quality requirement.
Define what must be checked again
Record the tested conditions and their limits. Do not turn one successful trial into a claim of process capability or a validated operating range. Those conclusions need a study designed for that purpose.
Agree recheck conditions for grade, tool, cavity or relevant process changes and restarts. Preserve the original record so the next reviewer can see what changed. Where a finding remains open, name its owner and the next required evidence rather than marking the whole trial complete.
The useful outcome is a traceable decision: what was tested, what passed, what remains open and why. That record is more valuable than an undocumented setting that happens to produce a smoother sample.
POM Sink Marks and Internal Voids: Practical Questions
Can a sink mark become an internal void?
A change in cooling or feeding conditions can alter whether shrinkage appears at the surface or within a section. A smoother outside therefore does not establish internal quality. Compare identified parts using the required surface and internal checks before deciding that a change has resolved the defect.
Does a smaller gate reduce POM sink marks?
A smaller gate is not a general remedy for POM sink marks. The gate must support feeding while the affected section needs it. Review gate geometry, location and freezing behavior with the tooling engineer, using the grade guidance and actual trial evidence before authorizing any tool change.
Why does more hold time stop increasing part weight?
Additional holding time may stop adding measurable mass when further feeding no longer occurs under the trial conditions. Check the measurement resolution and variation, then consider gate and feed-path behavior. The plateau describes that experiment; it does not establish that a thick region has received adequate compensation.
Does a stable part weight prove there are no voids?
No. Stable weight does not locate material within the part or inspect a critical internal region. Keep cavity identity and compare the mass record with the specified internal examination, dimensions and functional checks. An incomplete internal inspection remains open even when the sampled weights appear consistent across the trial.
Should I change POM grade before reviewing the tool?
Do not use a family change as proof that a feeding limitation will disappear. Confirm the current grade and controlled trial evidence, then review the feed path and application requirements. If a substitution is proposed, qualify that exact grade in the part rather than relying on a general family claim.
For POM sink marks, close the remaining checks before calling a correction successful. For a material discussion, use the catalog to identify the complete grade and prepare the drawing, lot details and trial record. Keep surface improvement, internal acceptance and final part release as distinct recorded decisions.